

February is usually the snowiest month here in New England, which generally leaves me praying for the first signs of Spring with every new day. I’ve long given up hope on the Groundhog’s promise of an early Spring. Instead I just hold on to the notion that “Hope Springs Eternal” and jazz up my home with all the Spring flowers I can think of. One of the first ones for me is the cheery Cherry Blossom.
Cherry Blossoms are easy to make and will quickly liven up your home with tiny shocks of pink from the palest blush to the brightest hot pinks. And because we are not Mother Nature, we are only confined to the limits of our imagination! How about some purple cherry blossoms? Or maybe some patterned paper ones? Whatever you decide, a paper cherry blossom can adorn a quick note card, a wreath (why not?) or even a bare branch from your garden.

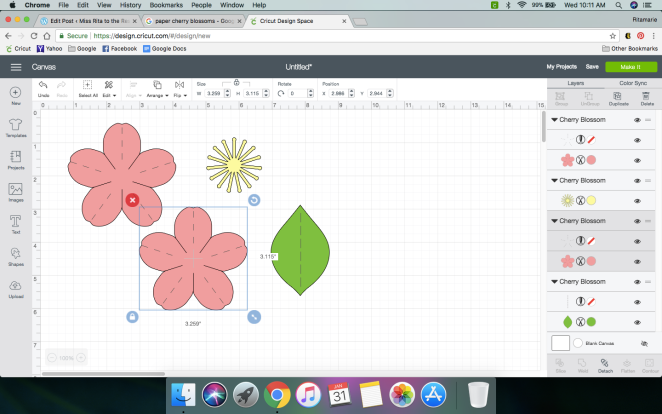
My cherry blossom pattern comes from a FREE design in Design Space entitled “Cherry Blossom Tree”. Find it quick by searching for “cherry blossom” in the Images section. Here’s a photo to help guide you:

I happen to like my cherry blossoms full, so the first thing I do is Ungroup the file and Duplicate the flower portion so that each of my blossoms has two petal layers. To be honest, sometimes I will duplicate the yellow stamen, because it is so intricate and I have a tendency of ripping them when I remove them from my mat, but that’s up to you.
For variety, I like to use a few different colors and sizes for a bigger cherry blossom project. This is easy to achieve by grouping your blossom again and duplicating the file. After duplicating the file you can manipulate the size and petal leaves. Try blush, white or mauve colors and you’ll then have four different blossoms to work with.

After cutting and removing all your cuts from the cutting mat, head over to your work area with the cuttings, a shaping tool, some glue and foam dots and some different sized pearl buttons. Using your shaping tool, you want to carefully crease each petal to give it some shape. The leaves also will be creased this way. The stamens can be carefully bent to give them more texture, too. Once you’ve completed all the shaping, all that is left is assembly.

To give the blossoms more fullness, I like to use foam dots between the two petal layers and also adhere them together slightly askew. After adhering the petal layer, use white glue to place the stamen inside the blossom. When dry, place an appropriately sized pearl inside. Depending on your pearls, you may want to glue these.

And finally, flip your blossom over and affix the leaf to the back. Allow the glue to dry before flipping them back over.
And viola! Your blossoms are now ready to adorn any project.

I hope you try to make these super simple Cherry Blossoms. Hurry back for more paper projects including future projects for making Paper Peonies, Hydrangeas and Daffodils!


what are cbd delta 8 gummies
LikeLike